Why Some Glaze Recipes Fail at Different Kiln Temperatures
Why ceramic glazes fail at wrong temperatures. The chemistry of eutectic melting, flux behavior, and how cone 6 glazes can't work at cone 10 or vice versa.
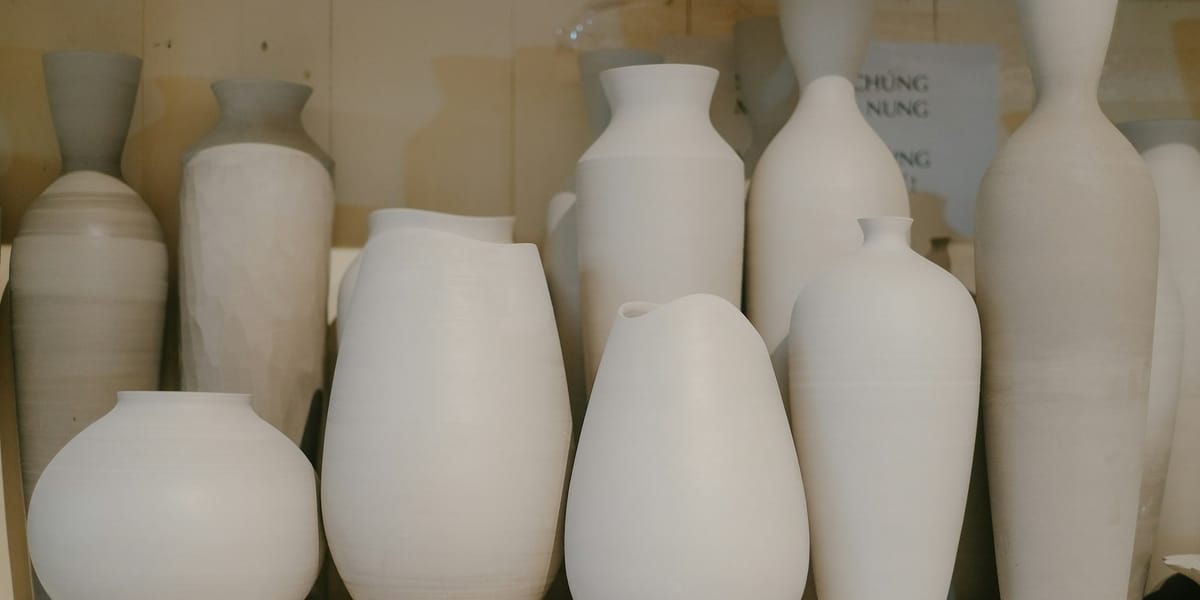
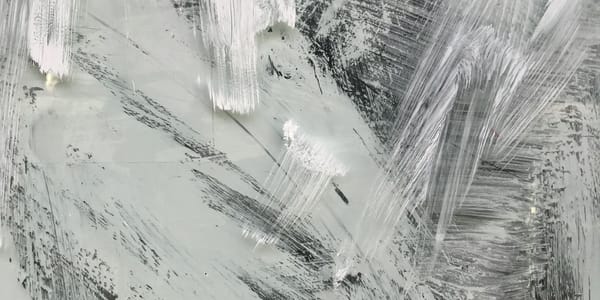
The glaze recipe you found online promises beautiful celadon green at cone 10. You fire it at cone 6 to save energy costs and the result is dry, rough, barely melted surface that looks nothing like the promised glossy translucent finish.
This isn't bad luck or mysterious kiln variation. It's chemistry.
Glazes are carefully balanced mixtures of silica, alumina, and fluxes that melt at specific temperature ranges. The recipe formulated for cone 10 (approximately 2350°F/1285°C) requires that temperature to achieve the eutectic melting that creates glassy surface. Fire it 200°F cooler at cone 6 (2230°F/1220°C) and the chemical reactions don't complete, the glass doesn't form properly, and the surface remains partially unmelted.
The opposite failure happens when you fire low-temperature glaze too hot. The cone 6 glaze with perfect satin finish at correct temperature turns into running mess at cone 10 as the glass becomes too fluid, flows down the pot, and potentially fuses the piece to the kiln shelf.
Understanding why glazes fail at incorrect temperatures requires examining the chemistry of glass formation, how different fluxes behave across temperature ranges, what happens to silica and alumina networks at various heats, and how all these components interact in complex mixtures that only work within narrow temperature windows.
The practical implication affects every ceramicist who finds a glaze recipe and assumes it's universally applicable. Temperature isn't variable you can casually adjust. It's fundamental parameter determining whether the chemical formula works at all.
This explains why experienced potters maintain separate glaze arsenals for different firing temperatures rather than trying to force single glaze across temperature ranges. The chemistry simply doesn't allow it.
The Chemistry of Glass Formation
Glazes work by forming glass—an amorphous solid where atoms arrange randomly rather than in crystalline structure. Creating this glass requires specific chemical components in proper proportions melting at achievable temperatures.
Silica (SiO₂) forms the fundamental glass network. Pure silica melts at roughly 3100°F (1700°C), far too high for practical ceramic firing. The glass former needs help to melt at reasonable temperatures.
Fluxes lower silica's melting point by disrupting the silica network and allowing glass formation at lower temperatures. Common fluxes include sodium, potassium, calcium, magnesium, zinc, barium, and lithium compounds. Each flux affects melting behavior differently.
Alumina (Al₂O₃) doesn't melt at ceramic temperatures but contributes to glass durability, viscosity, and surface quality. The silica-alumina network creates stronger, more stable glass than pure silica glass.
The ratio between these components determines the glaze's melting temperature and character. High silica with minimal flux requires high temperature. More flux and less silica melts at lower temperature. Alumina content affects how the glass behaves when melted.
This explains why glaze formulas aren't arbitrary ingredient lists. They're chemical equations where proportions determine melting behavior. Change the firing temperature and you've altered whether the equation balances.
Eutectic Melting and Temperature Ranges
The eutectic point represents the temperature where mixture of compounds melts lower than any individual component would alone. This phenomenon allows glazes to melt at practical temperatures.
A mixture of silica and flux doesn't melt gradually as temperature increases. It remains solid until reaching the eutectic temperature, then melts relatively quickly as the components chemically combine into glass.
Different flux combinations create different eutectic temperatures. Sodium and potassium create low eutectic points around cone 06-04 (1830-1940°F). Calcium and magnesium create higher eutectic points around cone 6-10 (2230-2350°F). Multiple fluxes together create eutectic points different from single fluxes alone.
The glaze formulated for cone 10 using calcium and magnesium fluxes reaches its eutectic point around 2350°F. Fire it at cone 6 (2230°F) and you're below the eutectic temperature. The components don't combine into proper glass because the temperature never reaches the point where eutectic melting occurs.
This isn't gradual failure where the glaze is "less melted." It's threshold effect where below the eutectic point, glass formation doesn't proceed properly regardless of soak time or other firing adjustments.
The temperature range where glaze works well typically spans only 1-2 cones (roughly 30-60°F). Outside this range, either the glaze doesn't melt enough (fired too cool) or becomes too fluid (fired too hot).
Flux Behavior Across Temperature Ranges
Different fluxes function optimally at specific temperature ranges, which is why low-fire and high-fire glazes use completely different flux systems.
Sodium and potassium (from soda ash, pearl ash, nepheline syenite, or feldspars) work effectively at low temperatures (cone 06-6). They create very fluid glass that flows readily. At high temperatures, they become extremely fluid and volatile, creating running glazes and kiln atmosphere contamination.
Calcium (from whiting, dolomite, or calcium carbonate) functions across wide temperature range but works best at mid to high temperatures (cone 6-10). At low temperatures, calcium doesn't flux effectively enough. At proper temperature, it creates durable, stable glazes.
Magnesium (from dolomite, talc, or magnesium carbonate) requires high temperatures (cone 9-10) to flux properly. At lower temperatures, it remains largely unreacted. At cone 10, it contributes to beautiful matte and satin surfaces.
Zinc oxide fluxes at mid temperatures (cone 4-8) but becomes volatile at higher temperatures. The zinc vaporizes, creating glaze defects and contaminating kiln atmosphere.
Barium carbonate fluxes at mid to high temperatures but creates toxic barium compounds that can leach from fired glaze if chemistry isn't balanced properly.
The practical implication: you can't simply increase flux to make high-fire glaze work at low temperature. If your cone 10 glaze uses magnesium flux, adding more magnesium won't make it melt at cone 6 because magnesium doesn't work as flux at that temperature. You'd need to completely reformulate with sodium or potassium fluxes.
The Alumina Effect on Viscosity
Alumina content dramatically affects glaze viscosity—how easily the melted glass flows. This creates temperature-dependent behavior that explains many glaze failures.
High alumina content (over 0.5 molar equivalents in glaze formula) creates viscous, stiff glass that resists flowing. This works well for vertical surfaces where you don't want glaze running. But it requires adequate temperature to melt the alumina-silica network.
Low alumina content (under 0.3 molar equivalents) creates fluid glass that flows readily. At correct temperature, this produces glossy smooth surfaces. At too-high temperature, it runs off the pot.
The alumina-silica ratio changes effective melting point significantly. Two glazes with identical flux content but different alumina levels melt at different temperatures. The high-alumina version needs more heat to achieve the same fluidity as the low-alumina glaze.
This explains why matte glazes (typically high alumina) often fail when under-fired. The glaze might technically melt, but the high alumina keeps it so viscous that the surface remains rough rather than developing the intended satin matte finish.
Conversely, glossy glazes (low alumina) become too fluid when over-fired. The minimal alumina provides little viscosity control, so the melted glass flows excessively.
Clay bodies also contribute alumina to glaze through interaction at the clay-glaze interface. The glaze absorbs some alumina from the clay during firing. This means the same glaze on different clay bodies can behave differently even at the same temperature.
Silica Network Structure
Silica's role as glass network former creates temperature-dependent behavior affecting how glazes mature.
Free silica added as flint or quartz must dissolve into the glass network during firing. This requires both adequate temperature and time. At low temperatures, the silica particles don't fully integrate, creating rough surfaces with visible undissolved silica.
The silica from clay body contributes to glaze through interface reaction. The clay melts slightly, releasing silica that the glaze absorbs. At different temperatures, this clay-glaze interaction changes, affecting final glaze chemistry.
The cristobalite inversion at approximately 430°F (220°C) during cooling creates stress in glazes with high free silica content. This stress can cause crazing (surface cracking) if the glaze doesn't fit the clay body properly. The temperature history affects how much cristobalite forms.
The silica-to-alumina ratio in glaze formula determines glass network character. High silica creates hard, glossy surfaces but requires more flux to melt. Lower silica needs less flux but produces softer, more easily scratched surfaces.
Feldspars contribute both silica and flux (plus alumina), making them fundamental glaze ingredients across temperature ranges. But different feldspars have different compositions, affecting how they function at various temperatures.
The Cone System and Temperature Measurement
Understanding why glazes fail at wrong temperatures requires understanding that cone numbers represent more than just temperature points.
Pyrometric cones measure heat-work—the combination of time and temperature. A cone bends when it absorbs enough heat energy, which depends on both peak temperature and how long the kiln stayed near that peak.
This means cone 6 doesn't indicate single temperature but a range where the cone bends. A fast-fired kiln might reach higher temperature to achieve cone 6. A slow-fired kiln with long soak reaches cone 6 at slightly lower peak temperature.
The oxidation versus reduction atmosphere affects cone behavior slightly. Reduction atmosphere creates slightly more heat-work at given temperature, meaning cones bend earlier than in oxidation.
This heat-work concept explains why glaze fired quickly to cone 6 might differ from same glaze fired slowly to cone 6. The temperature history affects how glaze components react and integrate.
The cone placement in kiln matters. Cones near elements or burner ports experience different heat-work than cones in cooler kiln areas. The glaze results vary with kiln position accordingly.
Digital controllers claiming cone 6 program might not actually achieve cone 6 heat-work if the programming doesn't account for proper ramp rates and soaking. Trusting controller alone without witness cones can produce unexpected glaze results.
Converting Glazes Between Temperatures
The frequent question "Can I fire this cone 10 glaze at cone 6?" typically deserves answer "No, but you can reformulate it."
Simple temperature adjustment doesn't work because flux systems differ fundamentally between temperature ranges. Cone 10 glazes use calcium, magnesium, and potassium fluxes that don't work properly at cone 6.
The reformulation requires calculating glaze formula (not just recipe by weight), identifying which fluxes to substitute, adjusting silica and alumina to maintain proper ratios, and extensive testing to achieve desired results.
The molecular formula approach using unity formula (where total flux oxides equal 1.0) allows systematic reformulation. You identify target silica and alumina levels for desired temperature and surface, then adjust flux combinations to achieve melting at that temperature.
The conversion from cone 10 to cone 6 typically requires replacing calcium and magnesium with more active fluxes like sodium, potassium, or zinc. The silica might need reducing because cone 6 glazes generally have lower silica than cone 10 glazes.
The reverse conversion from cone 6 to cone 10 requires replacing active fluxes with more refractory fluxes and typically increasing silica content. The volatility of sodium and potassium at high temperatures creates problems that careful formulation must address.
The realistic assessment recognizes that some glaze effects depend on specific temperature. The cone 10 reduction celadon's color comes from iron chemistry that behaves differently at cone 6. Converting the recipe to cone 6 produces different color regardless of flux adjustments.
The easier approach often involves finding glaze formulated for desired temperature rather than attempting conversion. Experienced ceramicists maintain separate glaze libraries for each firing temperature they use.
Temperature and Glaze Defects
Many common glaze defects result from incorrect firing temperature rather than glaze formula problems.
Crawling (where glaze pulls away from clay surface leaving bare spots) often indicates under-firing. The glaze doesn't melt enough to bond properly with clay body. Raising temperature usually solves crawling if the glaze isn't over-fluxed.
Pinholing (tiny holes in glaze surface) can result from either under-firing or over-firing. Under-firing leaves pinholes from incomplete melting. Over-firing creates pinholes from trapped gases trying to escape overly viscous glass.
Running (glaze flowing down pot during firing) indicates over-firing for that glaze composition. The temperature exceeded the point where alumina can control viscosity. Either reduce temperature or reformulate with more alumina.
Blistering (bubbles in glaze surface) suggests overly vigorous gas release during melting, often from firing too hot or heating too quickly through critical temperature ranges where organic material combusts.
Crazing (fine cracking in glaze after firing) relates to thermal expansion mismatch between glaze and clay body. Temperature affects both materials' expansion rates, so firing higher or lower might affect crazing even if glaze appears properly melted.
Shivering (glaze flaking off at edges and rims) indicates compression rather than tension. This opposite of crazing can result from improper temperature creating wrong thermal expansion relationship.
Dry, rough surfaces typically indicate under-firing where glaze didn't reach eutectic point and glass network didn't form properly. More flux won't help if temperature is simply too low for the flux system used.
The Crystallization Question
Some glazes depend on controlled crystallization during cooling, making temperature and cooling rate critical for achieving intended effects.
The crystalline glazes deliberately encourage crystal formation during cooling from molten state. This requires specific temperature at peak to fully melt the glaze, then controlled cooling rate through temperature range where crystals grow.
Firing too low means glaze doesn't fully melt, preventing proper crystal formation during cooling. Firing too high creates different crystal structure or prevents crystallization entirely.
The cooling rate matters as much as peak temperature for crystalline effects. Fast cooling prevents crystal growth. Too-slow cooling allows excessive crystal size or wrong crystal types.
The matte glazes often develop matte surface through micro-crystallization during cooling. The temperature and cooling rate affect whether the intended crystal structure forms, creating matte surface, or whether the glaze remains glossy.
The temperature history throughout entire firing cycle—not just peak temperature—determines whether crystalline effects develop properly. This explains why identical glaze fired to same cone in different kilns produces different results if the cooling rates differ.
Clay Body Interaction Effects
The glaze doesn't exist independently. It reacts with clay body during firing, and temperature affects this interaction.
The interface zone where glaze meets clay experiences chemical exchange. Silica and alumina from clay enter glaze. Fluxes from glaze penetrate clay surface. At different temperatures, this exchange varies in depth and intensity.
High-iron clay bodies flux more actively at high temperatures, affecting glaze color and melting. The same glaze on white stoneware versus red earthenware produces different results partly because clay contributes different chemistry to glaze.
Porcelain bodies remain more refractory (resistant to melting) than stoneware, providing stabler base for glaze. But porcelain can show more pin-holing because the dense body releases gases differently than porous stoneware.
The clay maturation temperature must match glaze temperature. Firing cone 10 glaze on cone 6 clay body over-fires the clay, creating bloating, warping, and glaze defects from excessive clay melting.
The reverse problem occurs with cone 6 glaze on cone 10 clay. The clay remains under-fired and porous while glaze melts properly. The porous body can leak liquids through the glaze if the glaze crazes or develops any micro-cracks.
Atmospheric Effects on Temperature Requirements
Oxidation versus reduction atmosphere affects how glazes mature at given temperature.
Reduction atmosphere (lack of oxygen during firing) creates chemically reducing conditions that affect certain glaze colorants dramatically. Copper becomes red in reduction but green-blue in oxidation. Iron produces celadon greens in reduction, browns in oxidation.
The reduction also creates slightly more heat-work at given temperature because the combustion dynamics differ. Glazes might mature at slightly lower cone in reduction than in oxidation.
The kiln atmosphere affects glaze surface quality independently of temperature. Reduction firing can create orange peel texture from surface reduction effects. Heavy reduction can cause glaze blistering from carbon trapping in glaze.
Salt and soda firing introduce sodium vapor that fluxes glazes during firing. The glazes formulated for salt/soda atmosphere require less flux because atmospheric sodium supplements glaze flux content. These glazes over-flux and run excessively in regular oxidation or reduction firing at same temperature.
Wood firing's fly-ash deposition adds flux to glaze surfaces, creating effects that depend on ash composition and quantity. Glazes formulated for wood firing account for this ash flux contribution.
Glaze Calculation Software and Temperature Prediction
Modern glaze calculation software helps predict whether glaze will work at specific temperature by analyzing molecular formula.
The software calculates unity formula showing relationships between silica, alumina, and flux oxides. Established ratio ranges for each firing temperature allow predicting whether glaze will melt properly.
For cone 6, typical ranges show silica 2.5-4.0, alumina 0.3-0.5, with fluxes totaling 1.0 molar equivalents. Glazes outside these ranges might not work properly at cone 6.
For cone 10, ranges shift to higher silica (3.0-5.0) and similar alumina (0.3-0.6), with different flux composition emphasizing calcium and magnesium over sodium and potassium.
The expansion calculation predicts thermal expansion coefficient, helping identify potential crazing problems before testing. Temperature affects expansion rates, so the calculation must account for firing temperature.
However, software predictions remain approximations. Actual testing determines whether glaze works because factors beyond simple chemistry affect results: firing schedule, kiln atmosphere, clay body interaction, and material variation.
The limit of glaze calculation involves effects that chemistry doesn't fully predict: surface texture, crystal formation during cooling, color development from trace elements, and aesthetic qualities that numerical analysis can't capture.
Testing Glazes at Different Temperatures
The systematic approach to understanding how glaze behaves across temperatures involves structured testing rather than random experimentation.
The line blend test mixes two base glazes in graduated proportions (100:0, 75:25, 50:50, 25:75, 0:100), then fires the entire series at target temperature. This reveals how different compositions affect melting and surface at that temperature.
The temperature series test fires identical glaze at multiple temperatures (cone 4, 5, 6, 7, 8 for mid-range testing). The results show exactly how the glaze behaves across temperature range, identifying optimal firing point.
The triaxial blend test systematically varies three components, creating matrix showing how different proportions affect results. This advanced testing method maps glaze behavior across composition space.
The documentation requirements include: exact recipe by weight, firing temperature and schedule, kiln atmosphere, clay body used, photographs of results, and notes on surface quality, color, fit, and defects.
The testing discipline prevents wasted effort pursuing glazes that chemistry predicts won't work. Calculate first, test second, saves materials and kiln space compared to random testing.
Commercial Glaze Limitations
Commercial pre-mixed glazes specify firing temperature because manufacturers formulated them for specific temperature ranges.
The cone 6 commercial glaze won't work at cone 10. The manufacturer used flux systems optimized for mid-range firing. At cone 10, the glaze over-fluxes, runs excessively, and potentially fuses work to kiln shelf.
The cone 10 reduction glaze fired in cone 6 oxidation produces disappointing results because the reduction chemistry that creates the intended color and surface doesn't occur.
The manufacturer testing occurred at specific temperature under controlled conditions. Deviating from specified parameters produces unpredictable results that aren't manufacturer's fault.
The temperature range indicated on commercial glazes ("cone 5-6" or "cone 9-10") represents tested working range. Even within this range, results vary. The glaze might look best at cone 6 but work adequately at cone 5.
The commercial glaze mixing complications arise when combining glazes formulated for different temperatures. The cone 6 blue mixed with cone 10 white produces neither intended glaze's characteristics because the temperature requirements conflict.
The Practical Studio Approach
Working ceramicists develop practical strategies for managing glazes across firing temperatures rather than fighting chemistry.
The dedicated glaze arsenals for each temperature (separate cone 6 and cone 10 glaze collections) accepts that temperature conversion isn't practical for most glazes. This redundancy costs money but prevents frustration.
The consistent firing schedule using same temperature and timing creates predictable results. Varying firing temperature creates varying glaze results even when kiln reaches same cone.
The extensive testing before committing good work validates that glaze works reliably at specific temperature on specific clay body. The testing investment prevents destroying valued pieces.
The detailed records of firing schedules, glaze batches, and results allow troubleshooting when problems occur. Documentation reveals whether issues stem from temperature variation, glaze batch differences, or clay body changes.
The realistic expectations acknowledge that some glaze effects require specific temperatures and can't be duplicated elsewhere. The cone 10 reduction copper red simply doesn't happen at cone 6 regardless of glaze adjustments.
The wisdom involves knowing when to reformulate versus when to accept that desired glaze requires investing in firing capability at specific temperature. Some effects justify the energy costs of high-fire kilns despite cone 6's efficiency advantages.
The ultimate understanding recognizes that glaze temperature isn't adjustable variable but fundamental parameter determining whether the chemistry works. Fighting this reality wastes materials, time, and emotional energy better spent working within chemistry's constraints rather than against them.